 Save
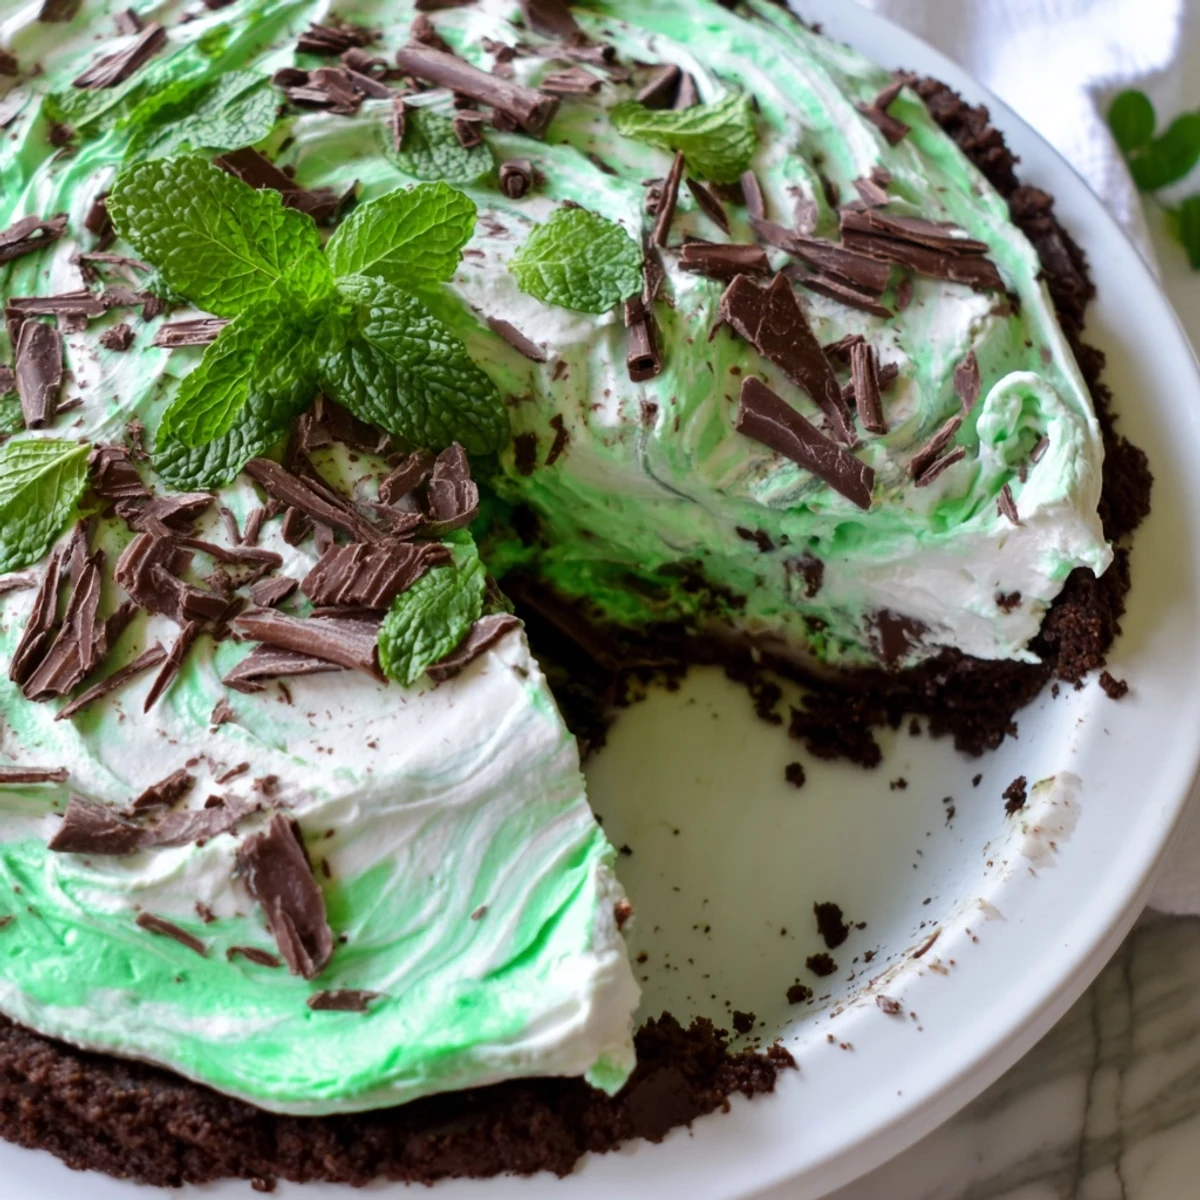
Save This stunning mint chocolate swirl dessert combines a rich chocolate cookie base with a luscious peppermint cream filling. The vibrant green marbled topping makes it an eye-catching centerpiece for spring celebrations.
Simple preparation comes together quickly—just whisk pudding, whip cream, and swirl together. The no-bake filling sets beautifully in the refrigerator, creating slices that hold their shape while remaining incredibly smooth and creamy.
Perfect for St. Patrick's Day gatherings or whenever you crave something refreshingly minty. The chocolate-mint combination offers classic flavor appeal, while the dramatic presentation looks impressive but requires minimal effort.
The first time I attempted a St. Patrick's Day dessert, I accidentally dyed an entire batch of buttercream frosting nuclear green. My husband still brings up the radioactive cupcakes every March, which is exactly why I fell in love with this shamrock swirl pie. The marble effect creates such an elegant minty look without requiring the heavy hand I apparently lack with food coloring.
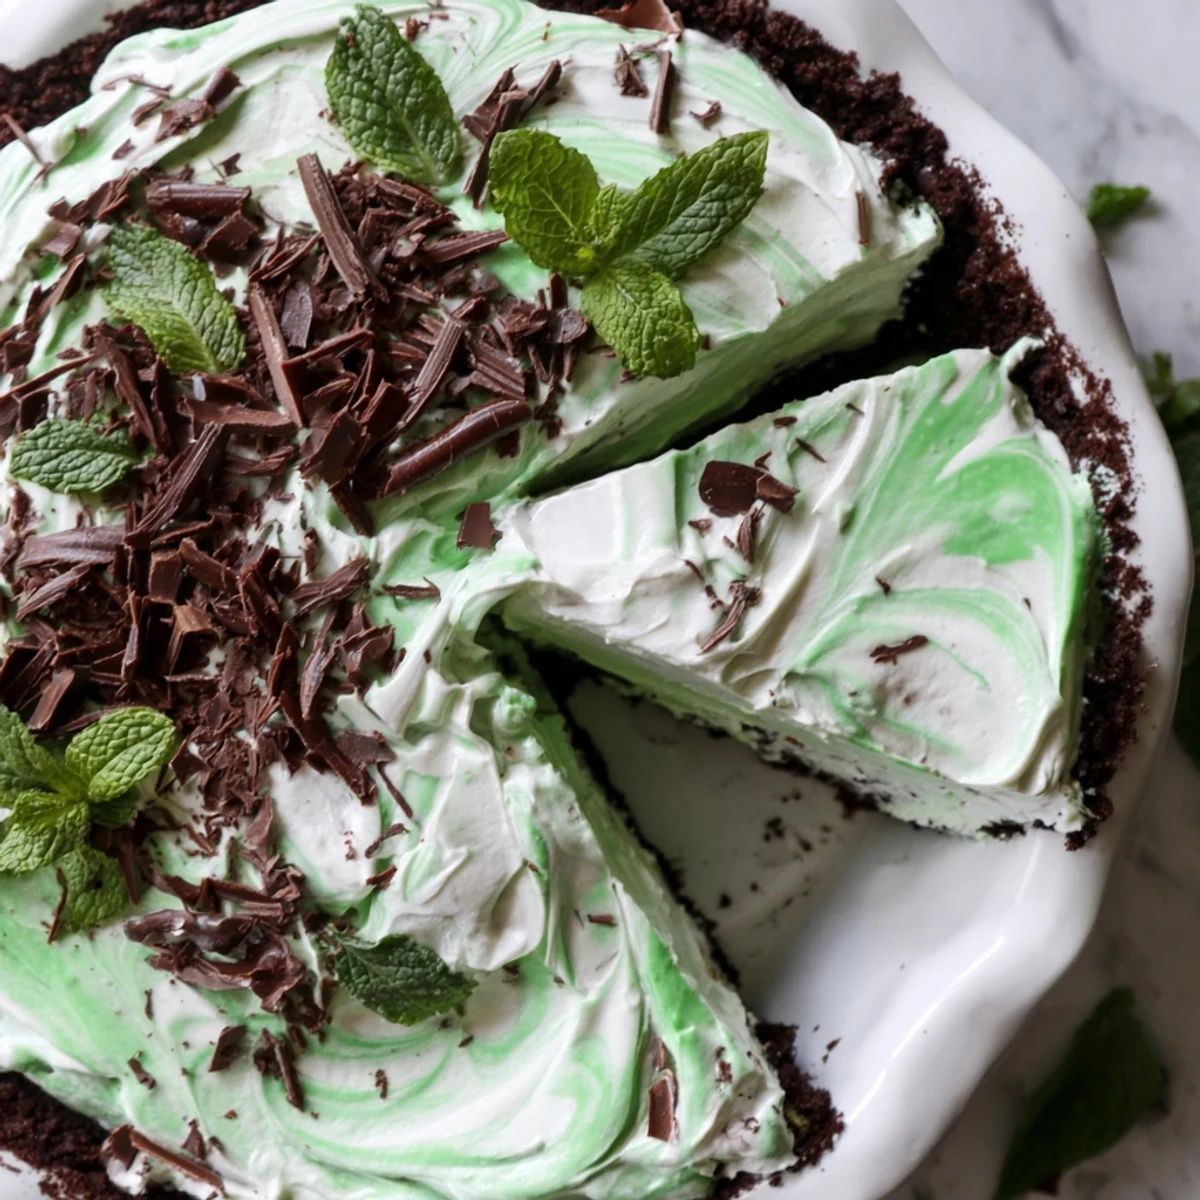
Last year I made this for my book club, and one friend actually asked if I'd hired a bakery to make it. Watching everyone's faces when I sliced into that green and white marbled masterpiece was the kind of kitchen moment that keeps me baking. The best part was telling them it took about twenty minutes of actual work.
Ingredients
- Chocolate cookie crumbs: The dark chocolate crust creates the perfect contrast to the bright mint filling. I use Oreos or chocolate wafers and pulse them in my food processor until they're fine sand.
- Unsalted butter, melted: Binds the crumbs together. Salted butter works too, just skip the pinch of salt in your filling if you go that route.
- Instant vanilla pudding mix: Creates the silky base for our mint cream. Cook and serve pudding won't set properly here, so stick with instant.
- Cold whole milk: Essential for thickening the pudding. Any other milk alternative gives disappointing results.
- Peppermint extract: Start with half a teaspoon. You can always add more, but you cannot take it back.
- Green food coloring: Gel coloring works best and won't thin out your filling. Add one drop at a time until you reach that perfect shamrock shade.
- Heavy whipping cream: This is what transforms the pudding into an ethereal mousse like filling. Don't attempt this with any lower fat cream.
- Powdered sugar: Sweetens and stabilizes the whipped cream. Sift it first to avoid any tiny lumps in your fluffy clouds.
- Vanilla extract: Balances the peppermint and keeps the mint flavor from becoming too medicinal or overpowering.
- Chocolate shavings and fresh mint: Completely optional, but that little shower of chocolate and sprig of mint makes people think you're fancy.
Instructions
- Build the chocolate foundation:
- Preheat your oven to 350°F and press those buttery chocolate crumbs into your pie dish with such determination that nothing will shake them loose. Bake for about 10 minutes, let it cool, and try not to break off pieces to taste test.
- Create the mint pudding base:
- Whisk the pudding mix, milk, and peppermint extract until thickened. This goes faster than you expect, so stay focused and keep whisking.
- Add the magic color:
- Drop in food coloring one drop at a time, mixing thoroughly after each addition. We want a pretty pastel green, not something that glows in the dark.
- Whip the cream into clouds:
- Beat that heavy cream with powdered sugar and vanilla until stiff peaks form. Your whisk should leave trails that don't disappear when you lift it from the bowl.
- Lighten the filling:
- Fold half the whipped cream into your green pudding mixture with a gentle hand, stopping when just combined. Overworking at this stage knocks all the air out.
- Assemble the base layer:
- Spread that minty cloud mixture into your cooled chocolate crust. Use an offset spatula for the smoothest surface.
- Create the swirl:
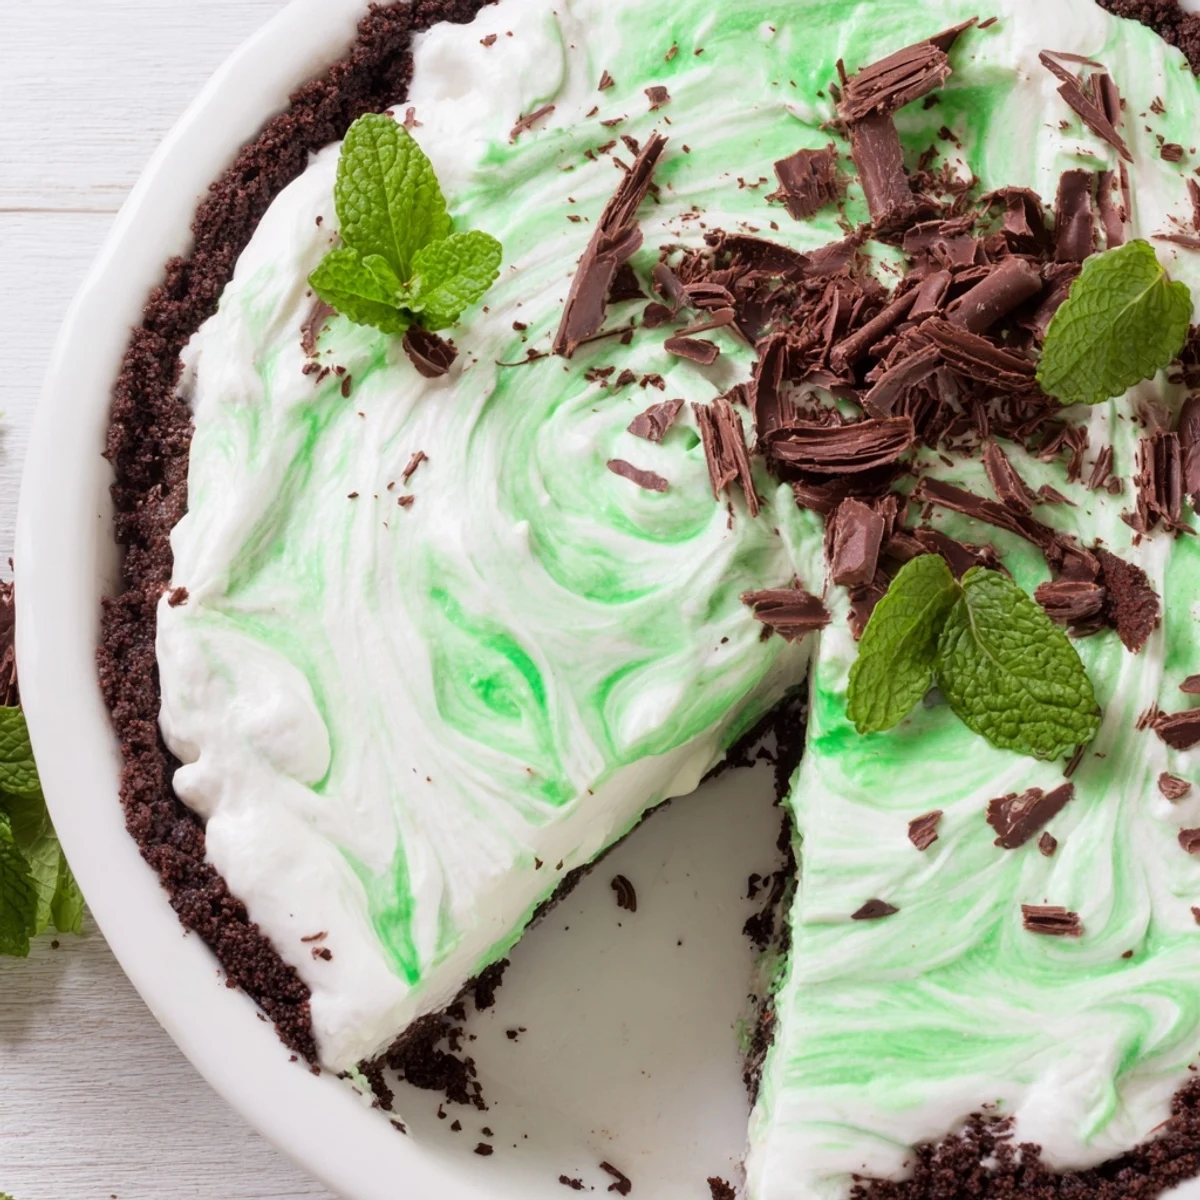
- Dollop the remaining white whipped cream over the green filling. Drag a knife or spatula gently through the dollops in a circular pattern to create that marble effect. Do not over swirl or you will lose the contrast.
- Let it set:
- Refrigerate for at least two hours, or until the filling is firm. The hardest part of this entire recipe is the waiting game.
- The grand finale:
- Shower the top with chocolate shavings and tuck a few fresh mint leaves around the edge. Serve to people who appreciate your artistry.
 Save
Save My niece now requests this for her birthday every year, even though it's in June and nowhere near St. Patrick's Day. Something about that cool mint and chocolate combination just screams celebration regardless of the season. It has become our family's official special occasion dessert.
Make Ahead Magic
This pie actually tastes better when made the day before, giving all those minty chocolate notes time to become best friends. The texture also firms up beautifully, making clean slices that hold their shape on the plate. I bake the crust in the morning, assemble everything in the afternoon, and serve it like I had all day.
Crust Variations
Graham cracker crusts work wonderfully if chocolate mint feels like too much intensity for your taste. The honey notes in graham crackers create a different kind of magic with the peppermint. I have even used crushed thin mint girl scout cookies in a pinch, which my daughter insists is the superior version.
Serving Suggestions
A cold slice pairs beautifully with a steaming mug of Irish coffee, the warm whiskey notes complementing the cool mint surprisingly well. For kids or anyone avoiding alcohol, a glass of cold milk is the classic choice that never fails. If you really want to impress, add a tiny drizzle of chocolate sauce around the plate before serving.
- Run your knife under hot water between slices for the cleanest cuts
- Let the pie sit at room temperature for about five minutes before serving for the creamiest texture
- Cover leftovers loosely with foil, but never wrap tightly or the swirl will get messed up
 Save
Save There is something deeply satisfying about slicing into that swirled green and white beauty, revealing the dark chocolate crust underneath. Every bite is a little celebration of texture and flavor that somehow feels both festive and comforting.
Recipe FAQs
- → How long does shamrock swirl pie need to chill?
-
Refrigerate for at least 2 hours until completely set. For best results, chill 3-4 hours or overnight. The filling firms up nicely, making clean slices easy to serve.
- → Can I make this ahead of time?
-
Absolutely—this actually tastes better when made a day ahead. The flavors meld and the texture becomes more stable. Store covered in the refrigerator for up to 3 days before serving.
- → What type of chocolate cookies work best for the crust?
-
Oreos or similar chocolate sandwich cookies create the richest flavor. Dark chocolate wafers offer a more intense cocoa taste. Graham crackers mixed with cocoa powder also work well.
- → How can I adjust the mint intensity?
-
Start with ½ teaspoon peppermint extract and taste after mixing. Add more in small increments—¼ teaspoon at a time—until reaching your desired strength. Remember the flavor mingles during chilling.
- → What's the best way to create the swirl pattern?
-
Drop dollops of plain whipped cream over the green filling, then gently run a knife or spatula through in circular motions. Don't over-mix—just a few passes create the prettiest marbled effect.
- → Can I use homemade pudding instead of instant?
-
Yes, though you'll need to cook and cool it completely before proceeding. Cooked vanilla pudding made from scratch works beautifully—just ensure it's fully chilled so it doesn't melt the whipped cream.