 Save
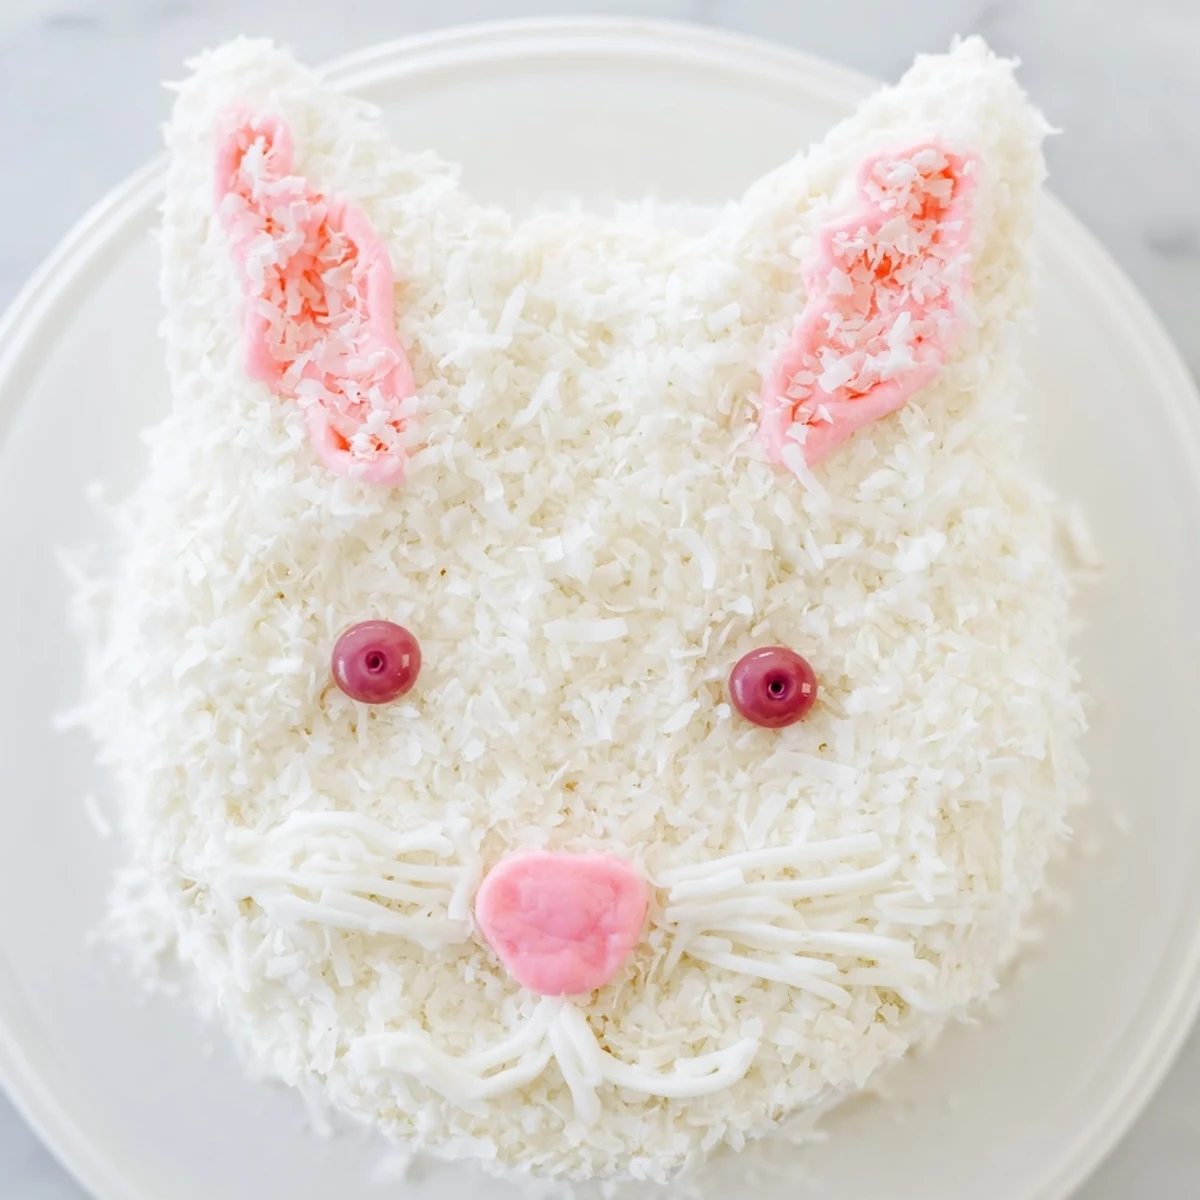
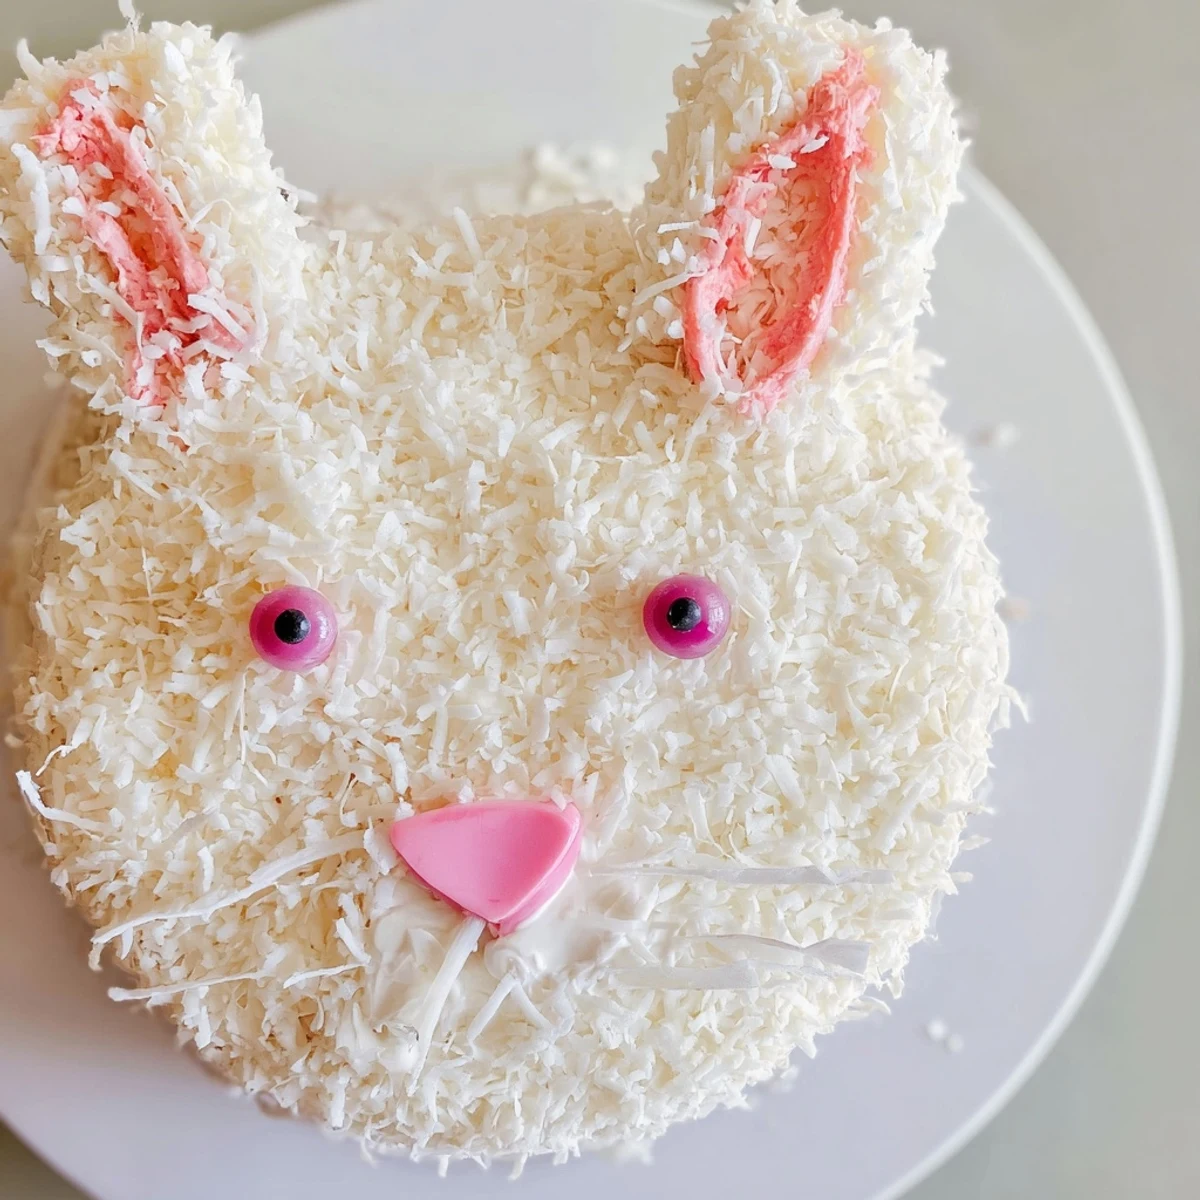
Save This delightful bunny-shaped creation brings whimsy to any spring table. Start with two moist vanilla rounds, then transform them into an adorable face, floppy ears, and bow tie arrangement. The entire surface gets coated in creamy vanilla buttercream and rolled in shredded coconut for that signature fluffy texture. Pink-tinted coconut adds sweet inner ear details, while simple candies bring the face to life. The finished masterpiece serves twelve and stays fresh for days, making it ideal for preparing ahead of weekend festivities or bringing to family gatherings.
The year my daughter turned four, she announced she wanted a bunny cake for her birthday. I had no idea what I was getting myself into, but her excitement was impossible to resist. We spent the entire afternoon covered in coconut and buttercream, making mistakes and laughing through every single one. That lopsided, coconut-covered bunny became the centerpiece of her party, and she still talks about it years later.
Last spring, my niece helped me make this for Easter brunch. She took her job of placing the jelly beans so seriously that she spent ten minutes arranging them, turning around with pride to show everyone her work. The adults were just as delighted as the kids, and honestly, something about coconut-covered anything makes people instantly happy.
Ingredients
- All-purpose flour: The foundation that gives this cake structure while staying tender
- Baking powder and baking soda: Work together for that perfect rise that makes the cake light
- Unsalted butter: Room temperature butter creates the creamy base for both cake and frosting
- Granulated sugar: Sweetens while creating that golden, tender crumb we all love
- Large eggs: Bind everything together and add richness to every bite
- Whole milk: Keeps the cake moist and adds a subtle depth of flavor
- Vanilla extract: Pure vanilla is worth every penny for that bakery-style taste
- Powdered sugar: Sifting first prevents lumps and makes frosting silky smooth
- Shredded sweetened coconut: Creates that fluffy fur texture that makes this bunny irresistible
- Pink food coloring: Just a drop transforms plain coconut into those adorable inner ears
- Jelly beans or mini candies: The personality makers that bring your bunny to life
- Fondant or marshmallows: Perfect for crafting those perky, expressive ears
Instructions
- Get your oven ready:
- Preheat to 350°F and grease those round pans with butter and flour, tapping out any excess
- Whisk the dry team:
- In a medium bowl, combine flour with baking powder, baking soda, and salt until well blended
- Cream butter and sugar:
- Beat them together until the mixture turns pale and fluffy, about 3 minutes of patience
- Add the eggs:
- Beat them in one at a time, letting each fully incorporate before adding the next
- Combine it all:
- Alternate adding flour mixture and milk, starting and ending with flour, mixing until just combined
- Bake the layers:
- Divide batter between pans and bake for 22 to 25 minutes until a toothpick comes out clean
- Let them cool:
- Give the pans 10 minutes before turning cakes onto wire racks to cool completely
- Make the frosting:
- Beat butter until smooth, then gradually add powdered sugar, vanilla, salt, and enough milk for spreading
- Sculpt the bunny:
- Keep one cake whole for the face, cut the second into two oval ears and a bow tie from the center
- Arrange your masterpiece:
- Place the face, ears, and bow tie on a large serving tray in your bunny configuration
- Crumb coat the cake:
- Spread a thin layer of frosting over everything and chill for 20 minutes to lock in those crumbs
- Add the fur:
- Frost completely and press coconut all over, gently patting it into the buttercream
- Color the details:
- Tint a small handful of coconut with pink food coloring and press onto inner ear sections
- Bring your bunny to life:
- Add fondant or marshmallow ears, then place candies for eyes, nose, and whiskers
 Save
Save My friend Sarah made this for her sons first Easter, and her family now requests it every single year. She texts me photos of their bunny variations, and somehow they get more creative with each attempt. The tradition started because she wanted something special, but it continued because it brings everyone together in the kitchen.
Making It Your Own
Chocolate cake works beautifully with this design, especially when you pair it with coconut buttercream. The contrast of dark cake and white fur is striking, and chocolate lovers will thank you for the twist. I once made this with lemon cake and cream cheese frosting, and the fresh flavor was perfect for spring.
Decorating With Kids
Little ones are obsessed with placing the candies, and honestly, their imperfections make the bunny more charming. Set up a station with various candy options and let them create the face, even if the eyes end up uneven or the smile looks more like a smirk. The pride they feel seeing their creation on the table is absolutely worth the extra coconut on the floor.
Storage And Serving
This cake keeps beautifully covered at room temperature for two days, though the coconut does start to soften slightly. If you are making it ahead, refrigerate it but bring it to room temperature before serving for the best texture and flavor. The buttercream tastes so much better when it is not cold from the fridge.
- Place a slice of bread in the container if refrigerating to keep the cake moist
- Add the coconut within a few hours of serving for the freshest appearance
- Use licorice strips for whiskers if you want something that holds its shape longer
 Save
Save Whether it is Easter, a birthday, or just a Tuesday that needs some joy, this bunny cake delivers smiles every single time. The memories made while creating it are just as sweet as the cake itself.
Recipe FAQs
- → How far in advance can I make this?
-
The cake layers can be baked and frozen up to two weeks ahead. Once assembled and decorated, it stays fresh covered at room temperature for two days or refrigerated for four days. Add coconut and final decorations the day of serving for best texture and appearance.
- → Can I use chocolate cake instead?
-
Absolutely! Chocolate pairs beautifully with the coconut coating. The darker color creates lovely contrast against white coconut flakes, and the rich flavor complements the sweet buttercream frosting perfectly.
- → What if I don't have fondant?
-
Large marshmallows sliced in half work wonderfully for inner ear details. You can also pipe pink frosting, use pink candy melts, or simply stick with the tinted coconut for the ears only.
- → How do I transport this without damaging it?
-
Use a large, flat board or sturdy platter and transport the fully assembled cake on that surface. If possible, place it on a non-slip mat in your car. Drive carefully and avoid sudden stops. Alternatively, decorate directly at your destination.
- → Can I make this gluten-free?
-
Yes! Substitute the all-purpose flour with a 1-to-1 gluten-free flour blend. Ensure your baking powder, vanilla extract, and all decorations (including candies and fondant) are certified gluten-free. The texture remains just as moist and delicious.
- → What's the best way to cut and serve?
-
Use a sharp knife dipped in hot water and wiped clean between cuts. Start from the outer edge and work inward. Each serving should include a portion of the face, plus ear or bow tie sections for everyone to enjoy the decorated pieces.