 Save
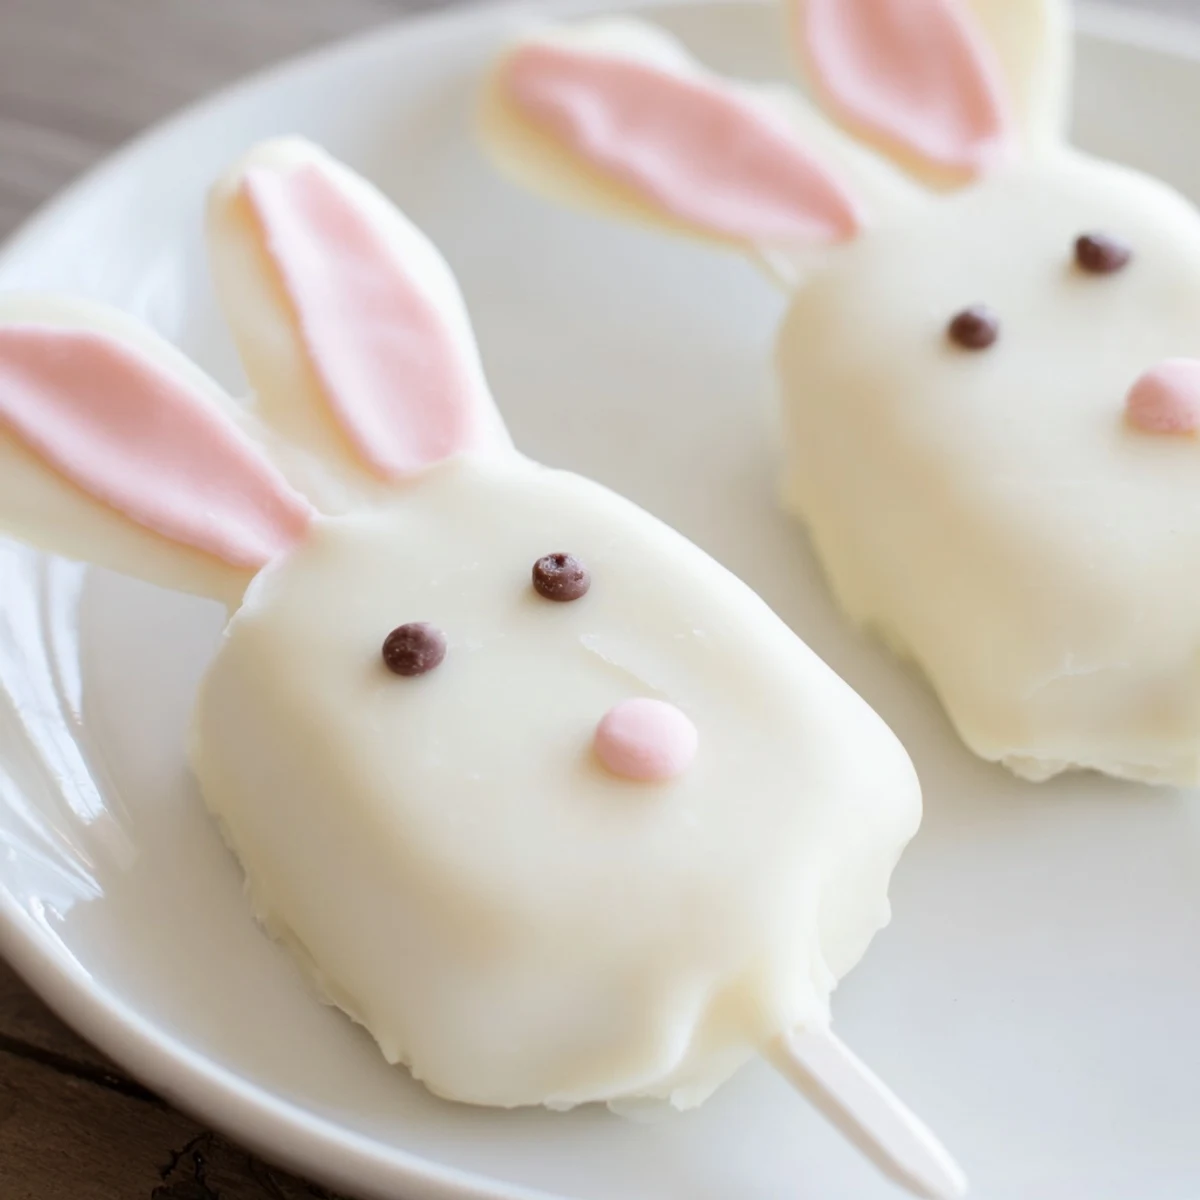
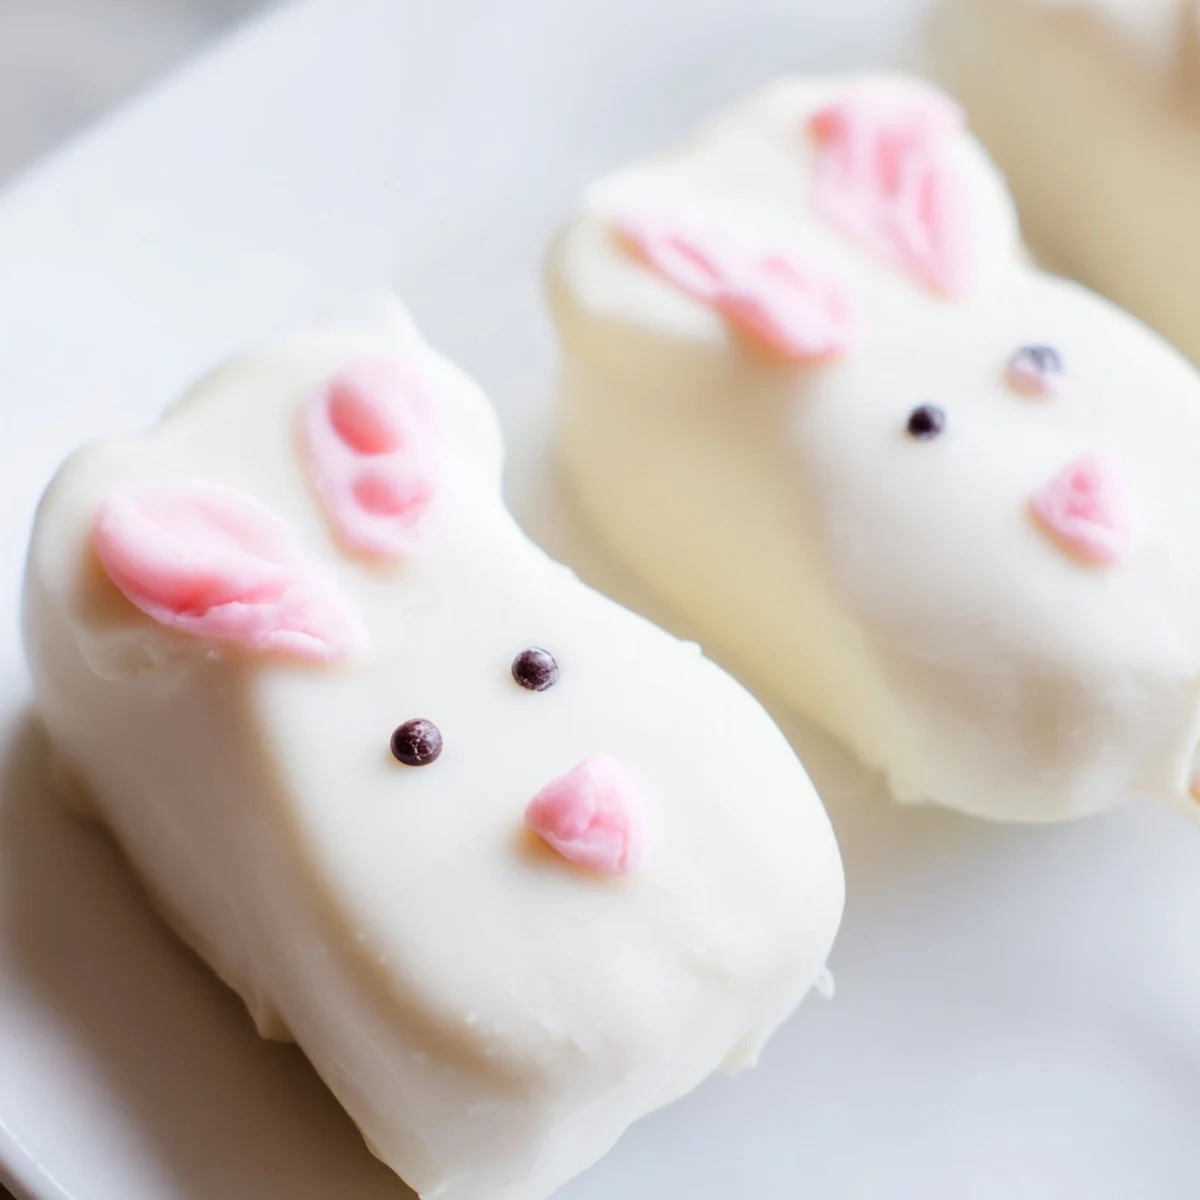
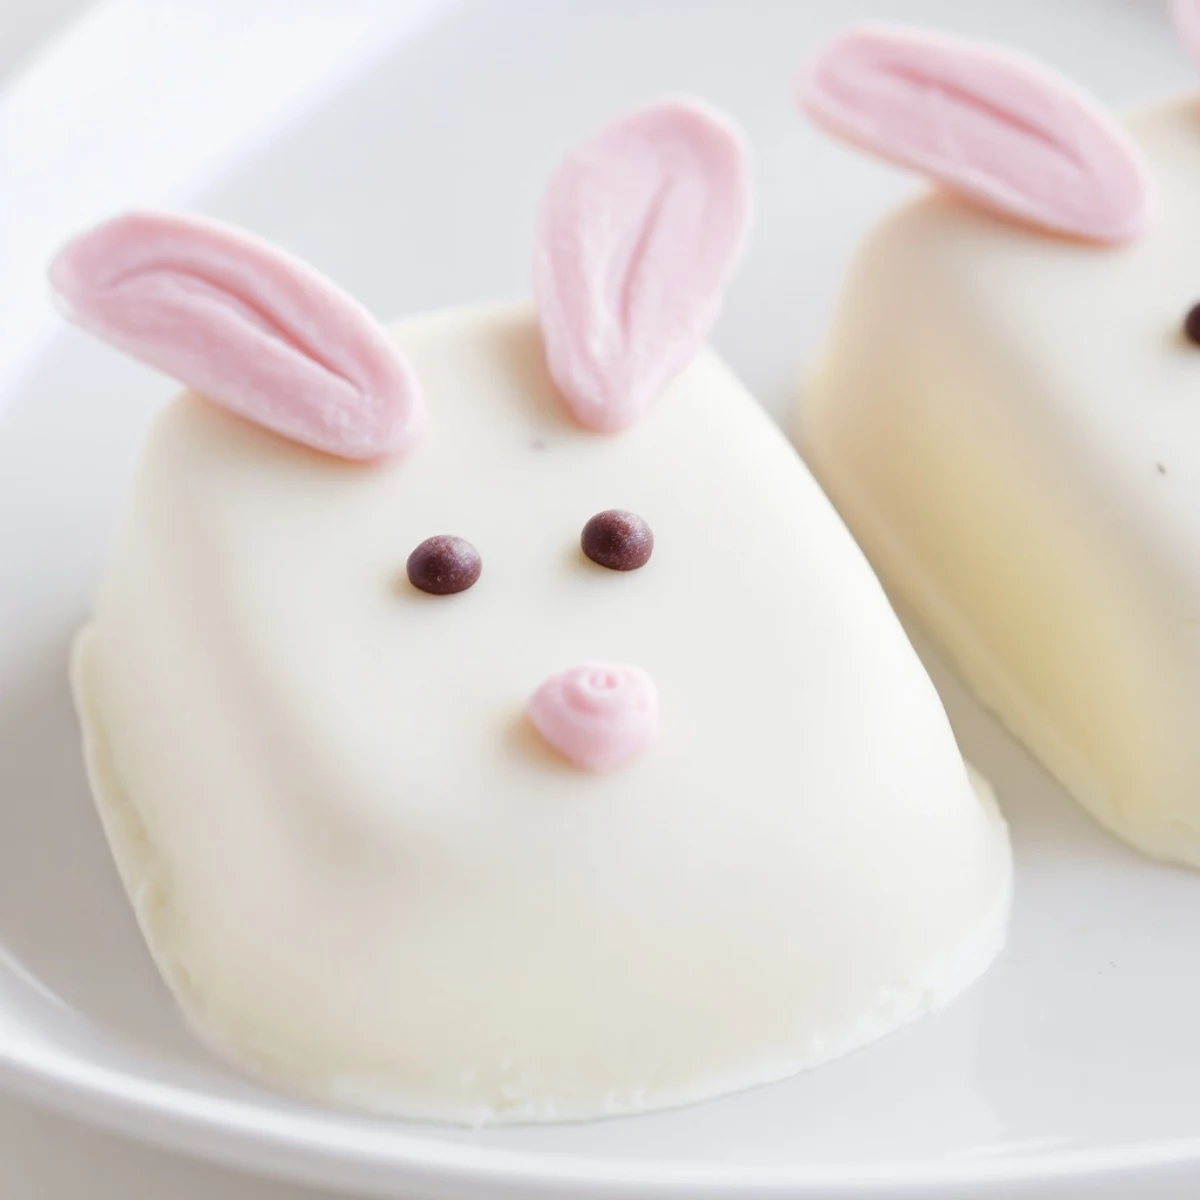
Save These delightful white chocolate bunny cakesicles combine moist vanilla cake crumbs with cream cheese and butter, shaped into adorable bunny faces and dipped in smooth white chocolate. Perfect for Easter gatherings, these handheld treats take about an hour from start to finish and yield eight festive portions. The cake mixture comes together quickly with store-bought or homemade crumbs, while the white chocolate coating creates a smooth canvas for decorating with candy eyes, sprinkles, and colorful bunny features using edible gel or fondant.
The kitchen counter was covered in sprinkles and white chocolate splatters when my youngest niece declared these the best thing shed ever tasted. Wed been attempting DIY Easter treats for hours, and honestly, the first batch looked more like lopsided snowmen than bunnies. But something magical happened when that creamy white chocolate hit the vanilla cake filling suddenly imperfect became charming.
Last Easter, my sister and I made forty of these for the family brunch, setting up a little decorating station with bowls of sprinkles and edible glitter. Watching adults argue over who got the pink-eared bunny was unexpectedly hilarious. The best part? Theyre surprisingly forgiving—a slightly crooked ear just adds personality.
Ingredients
- Vanilla cake crumbs: I usually bake a small sheet cake the day before and let it go slightly stale, which actually helps it bind better with the cream cheese mixture
- Cream cheese: Make sure its properly softened—cold cream cheese creates lumps that refuse to incorporate smoothly
- Unsalted butter: Room temperature is non-negotiable here for that dough-like consistency that holds its shape
- Powdered sugar: This tiny amount adds just enough sweetness to the filling without making it cloying
- Vanilla extract: Pure vanilla makes a noticeable difference in the filling flavor
- White chocolate: High-quality white chocolate melts better than candy coating, though both work
- Edible gel food coloring: Gels mix into melted chocolate without seizing it like liquid colors can
- Cakesicle sticks: Insert these at an angle for better stability and a more whimsical look
- Decorations: Candy eyes that youd use for cookie decorating work perfectly here
Instructions
- Mix the cake filling:
- Combine all the filling ingredients in a medium bowl, using your hands to really work everything together until it holds its shape when squeezed.
- Shape the bunnies:
- Form oval bunny faces, about 2 inches long, and insert sticks at a slight upward angle before chilling them thoroughly.
- Melt the coating:
- Heat white chocolate in 30-second bursts, stirring between each interval until completely smooth and glossy.
- Dip and decorate:
- Submerge each cake ball completely, tap off excess gently, and immediately add decorations while the coating is still wet.
 Save
Save My niece now requests these for every holiday, not just Easter—weve made ghost shapes for Halloween and tree shapes for Christmas. Theres something about food on a stick that makes everything taste better, dont you think?
Making Them Ahead
Ive learned through trial and error that these are actually better made the day before serving. The flavors meld together beautifully, and the coating has time to fully set without any panic. Store them in the fridge, but let them sit at room temperature for about 15 minutes before serving—the white chocolate is creamier that way.
Troubleshooting Common Issues
When my first batch of chocolate seized, I nearly threw in the towel. Adding a teaspoon of vegetable oil saved it completely. Also, if your bunny ears keep breaking off, try attaching them with a tiny dab of melted chocolate before the final dip—its a game changer for structural integrity.
Decoration Ideas That Work
After making these dozens of times, Ive found that simple decorations often look the most charming. A single pink candy nose and two eyes are sometimes enough, especially when the white chocolate coating is perfectly smooth.
- Roll the edges in sprinkles immediately after dipping for a framed effect
- Use a toothpick to draw whiskers into the wet chocolate
- Keep some unfilled stick-free cake balls on hand for testing coating temperature
 Save
Save Theres pure joy in watching someone bite into a cakesicle, especially when they hit that perfect balance of crumbly cake and silky chocolate. Happy Easter, and may your bunnies be adorably imperfect.
Recipe FAQs
- → What are bunny cakesicles made of?
-
Bunny cakesicles start with a mixture of vanilla cake crumbs blended with cream cheese, butter, powdered sugar, and vanilla extract. This dough gets shaped into bunny faces, placed on sticks, then dipped in melted white chocolate and decorated with festive toppings.
- → How long do these festive treats stay fresh?
-
Store your bunny cakesicles in an airtight container in the refrigerator for up to 3 days. The chilled storage keeps the white chocolate coating firm and the cake filling fresh.
- → Can I use different cake flavors?
-
Absolutely! While vanilla creates a classic base, chocolate, lemon, red velvet, or funfetti cake crumbs work beautifully. The cream cheese mixture balances any cake flavor perfectly with the sweet white chocolate coating.
- → Do I need a special mold for bunny shapes?
-
No mold required! Simply shape the cake mixture by hand into flattened ovals resembling bunny faces. A cakesicle mold can help with uniform sizing, but hand-shaping works perfectly and adds charming homemade character to each treat.
- → What decorations work best for bunny faces?
-
Candy eyes, sprinkles, and fondant cutouts create classic bunny features. Edible gel food coloring works well for pink noses and ears, while pretzel sticks or modeling chocolate make adorable ear details. Let your creativity guide your decorating style!
- → Why refrigerate the cake shapes before dipping?
-
Chilling the shaped cake mixture for 20-30 minutes firms them up, making them easier to handle on the sticks and preventing them from falling apart when dipped into warm melted chocolate. This step ensures clean, professional-looking results.